Setting up audio on Ubuntu can be quite daunting. I spent a few days researching many threads to figure it out. On the surface, my goal is pretty simple. I have a MIDI controller Nektar Impact 61+ and wanted to create sounds with it. More specifically in the order:
- it should be recognized by Ubuntu.
- I needed a software that plays the sound when I press a key on the controller.
- find any sound font and be able to play it with the above software (piano sound is the minimum).
- be able to play the sound via [REAPER] (https://www.reaper.fm/index.php) as a VST to record the keystrokes.
- (optionally) control the REAPER DAW with the control buttons of the controller (play button, record button, slider, etc.).
- (optionally) use the controller to input notes into MuseScore.
Sounds simple enough until you spend a few days figuring it out. Additionally, I have a Focusrite Scarlett 2i2 external USB audio interface. Just using it to play system audio can be problematic:
- random pops/cracks,
- audio does not work when waking from sleep,
- starting a program can mess up the whole configuration (e.g. Audacity),
- audio is recorded at different frequencies (playback is super fast and high pitched),
- any program does not start, crashes because it can not playback the audio
- problems with the WINE emulation and the sound drivers.
Killing the above programs alone can be frustrating, and you do not realize how important a proper audio setting is until you have to wait 180 seconds when shutting down the PC. In short, life becomes a misery. Obviously, pulseaudio is not suitable for such purposes.
JACK Audio Connection Kit for playing audio
If you search for the above topic, you will hear a lot about JACK. It’s a professional sound server daemon that provides real-time, low-latency connections. I was a little hesitant to try it out (I was already burned out on audio issues), but it’s the best decision I have ever made. Once I had it set up, my life became a breeze in terms of computer use as all of the above problems disappeared. However, it did require a little trial and error. It is also required for all of the following steps.
The first thing that can be problematic is running pulseaudio and jackd (https://jackaudio.org/faq/pulseaudio_and_jack.html) at the same time. Fortunately, there is a plugin called pulseaudio-module-jack that routes audio from pulseaudio to JACK when JACK is running, and returns to normal routing when JACK is not. To install all the things you need:
1sudo apt-get install jackd qjackctl pulseaudio-module-jack
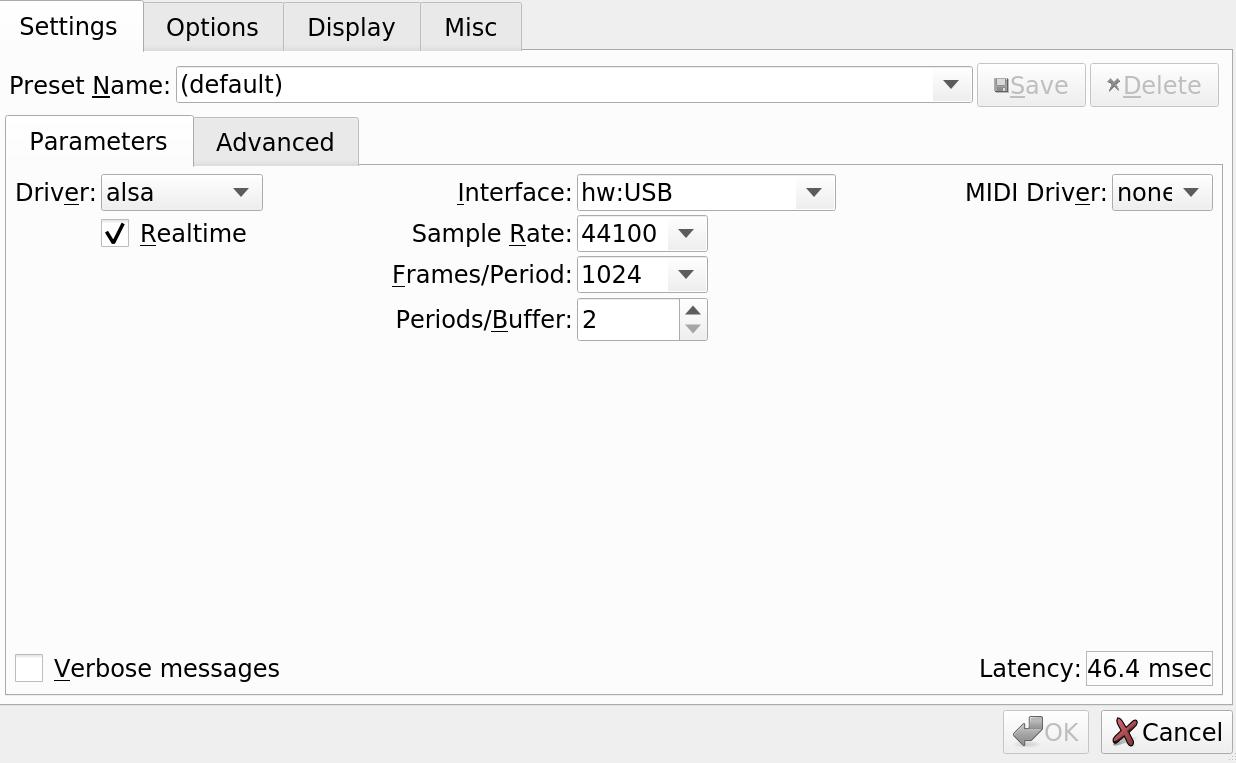
qjackctl is a GUI application for the JACK and helps with configuration. Run it with jackctl and set the following parameters:

See also this article for more information.
Run on start
I use the window manager i3 and execute the required commands via i3_config
at startup:
1exec_always --no-startup-id jack_control start # starts the daemon exec_always --no-startup-id pactl set-default-sink jack_out # pulseaudio to JACK routing with pulseaudio-module-jack plugin
If you are using a different window manager, you should use the appropriate mechanism for your case.
Troubleshooting, restarting JACK
With the above measures, everything works fine until it stops working. Sometimes when the computer wakes up, the USB port is not turned on, which messes up the whole configuration. For this purpose, I created the following command:
1killall -9 jackdbus; sleep 2 && jack_control start && pactl set-default-sink jack_out
which resets the JACK daemon and sets up the pulseaudio sink. This command has never let me down - if something goes wrong, it gets fixed.
Detect MIDI events from the controller
At this point, audio playback is controlled. Ubuntu should detect the MIDI controller by default, as long as it conforms to the standard. Plug it in and list the USB devices with it:
1lsusb
Since we are using JACK, we also need to bridge the ports of the MIDI system to JACK, which can be done with a2jmidid. It should be installed with JACK, otherwise use apt-get install a2jmidid. Run:
1a2jmidid -e
and reconnect the controller. It should show up in the list and can now be used as a source for MIDI events to play sound and control programs.
Make it automatic
You need to start the daemon every time you want to use the MIDI controller. This can be tedious and you can specify it in qjackctl under Setup > Options and under Execute script after Startup (a2jmidid -e &) as per the instructions here.
Carla
The MIDI controller should be recognized by JACK and now we want to create a sound with it. I looked at many options like LinuxSampler (cumbersome install), FluidSynth (it works but I do not find it optimal) and I ended up with Carla, which is a modular audio plugin host. You can install it with:
1sudo apt-get install carla
without installing the KXStudio repositories.
When you open Carla, it can be a bit… boring. You might think, what am I supposed to do here. In the beginning, I just wanted to load and play a SoundFont file of a grand piano and be done with it.
Salamander Grand piano SoundFont
I downloaded the SFZ Salamander Grand piano SoundFont here. Create a folder for your instruments and put the files there. Go to Carla > Configure Carla button on the toolbar > Plugin Paths menu item > select SFZ in the dropdown > Add plugin > select your folder path.
Then exit the settings dialog and click the Add Plugin button on the toolbar. Make sure the Sound Kits are selected in the Format section and click the Refresh button. The SalamanderGrandPiano plugin should now be available in the main area. Add it to the rack by double clicking on it. It should look like this:

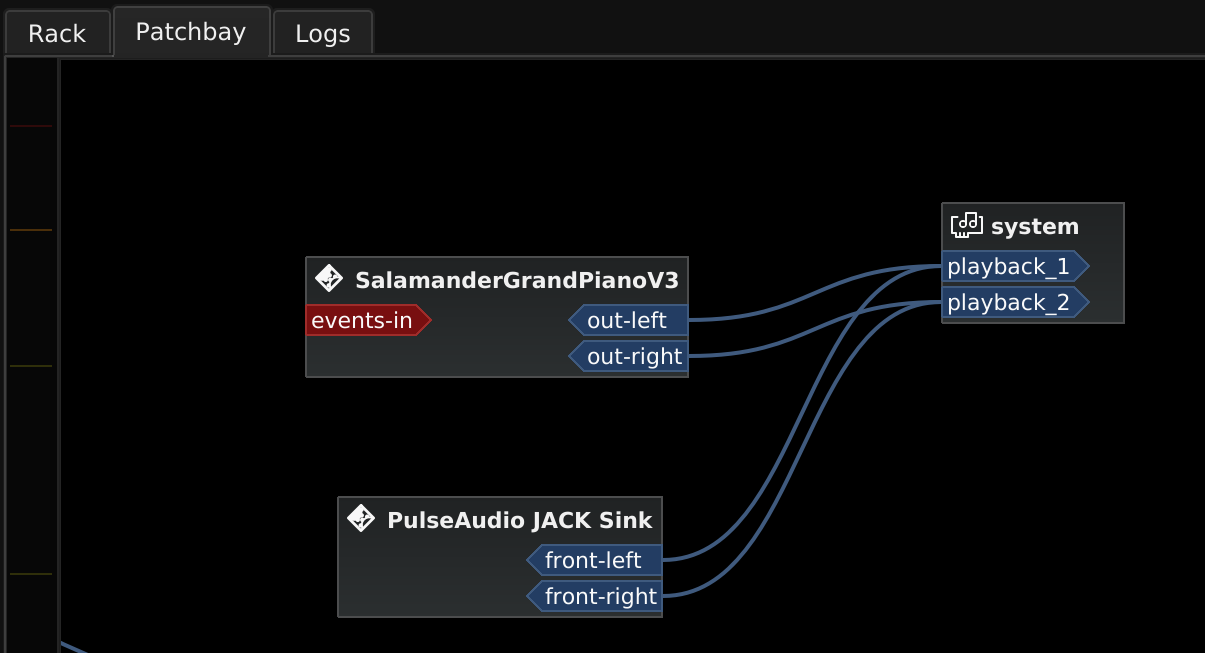
We can click on the wrench icon to try it out. However, when we press the virtual keyboard in the dialog box, no sound is produced. We need to direct our plugin to the system output first. Switch to the Patchbay tab in the main Carla area and route the SalamanderGrandPiano plugin to the system output:

Now if we go back to the Rack section, click the Wrench button, and click the virtual keyboard keys, the sound should be generated! Note that there is also a virtual keyboard in the Patchbay section, but it is grayed out on my end. This seems to be a problem with the JACK version - it requires at least 1.9.14, while the Ubuntu 20.04 repo has 1.9.12. However, this is not a big problem since we want to use an external MIDI controller.
Routing external MIDI controller to generate sound
If we take a look at the image above, we can see that there is a red sink events-in in the patchbay section. Make sure you run a2jmidid -e, which will show up as another module in Carla Patchbay. Your controller should be listed there - just connect it to the SalamanderGrandPiano and a keypress on the external keyboard should produce a sound!

Additional resources
There are 2 videos from conferences on the KXStudio site that explain how the Carla works. I recommend watching them at least in part to get the point.
Additionally, there are many plugins, SoundFonts, available for free:
REAPER DAW
I also wanted to record the controller with REAPER DAW.
- open REAPER and go to Preferences > Audio > MIDI devices.
- double-click your MIDI controller in the Input Panel and enable it by clicking the checkbox.
- click Reset all MIDI Devices in the same dialog.
- (Optional) Create a shortcut for the Reset all MIDI Devices action, as you will be using it frequently. Every time the connection to MIDI is lost or the device is turned off, you will need to reset the devices for it to work.
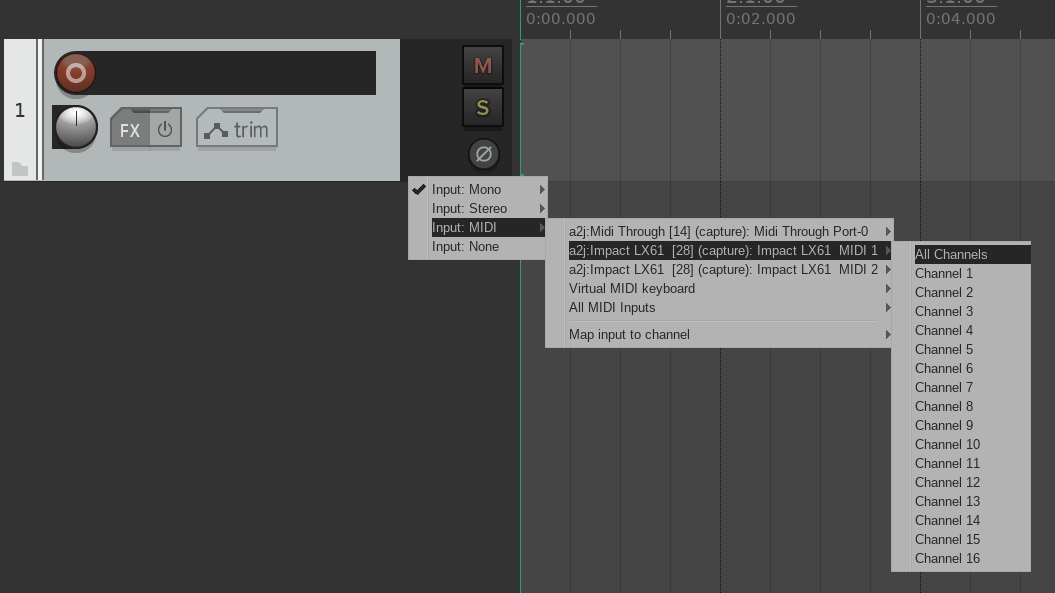
- create a new track in REAPER and change the input to MIDI:

- Arm the track for recording. When you press the button, it should show up, but no sound will be produced.
- go to settings again. Select Plug-ins > VST and click on Edit Path List … and add
/usr/lib/vst. Click on Re-scan and Apply. - Now we can apply Carla FX to the track by clicking FX button on the track and selecting CarlaPatchbay (falkTX). Again we add the SalamanderGrandPiano plugin, but this time we connect it to MIDI input and Audio Output. After that, we should already hear tones when we press the keys.
- Even easier is to select Carla-RackFX (falkTX) VST and then add all the plugins you want. You can select compressors, equalizers… The nice thing about this VST mode is that you do not have to route anything, because all plugins are routed in the order they appear in the rack.
That’s it. I am having some issues with Carla displaying correctly in REAPER, as I am using a 4K monitor, but otherwise it works fine.
Muse Score
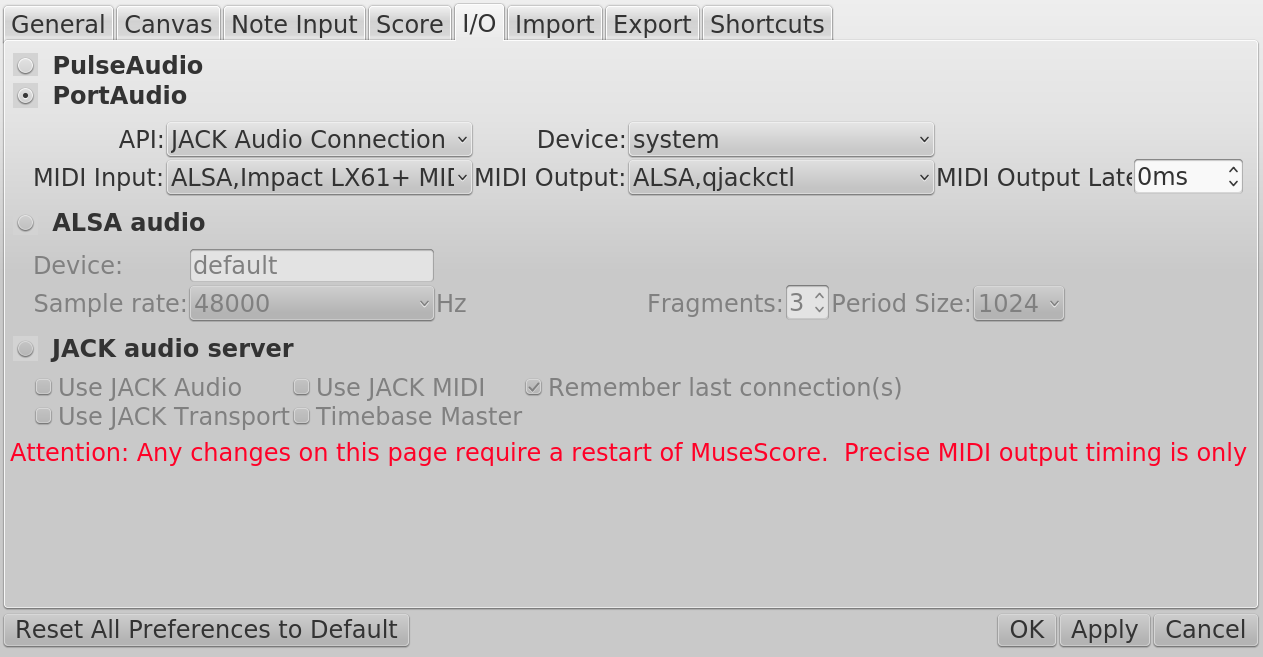
- Open MuseScore > Settings > I/O > select PortAudio > Apply.
- Open
qjackctl. It does not work without it running. - Restart MuseScore.
- Go to Settings - > I/O - > and select your device. My Settings:

- Your external controller should now work when entering notes.
- (Optional) you can reprogram some of your keys on the controller for control actions, allowing super fast note input and playback.
Conclusion
It took me a while to figure it all out, since I have only used Windows for audio production before, but I managed to make it work. Hopefully my journey helps someone.
Comments